

Controlling Neopixels in an NW.js App
This article will show you how to control WS2812b-based LEDs – better known as Neopixels – from an NW.js application. To do so, we will be using an Arduino Uno as the interface together with the johnny-five and node-pixel modules. It’s time to shine some light on the subject!
Adafruit’s Neopixels are RGB LED arrays that can be addressed individually using the I2C protocol. This means you can assign each LED its own color and brightness. They come in a variety of form factors such as strips, matrices, sticks, jewels and rings.
Under the hood, Neopixels use WS2812b-based LEDs. This means that this tutorial is also applicable to any WS2812b-compatible LEDs.
Being able to control LEDs from software is very cool and the physical applications are quite simply endless.
Reviewing the Hardware Prerequisites
For this tutorial, we will be using a strip of 30 Neopixel RGB LEDs. This strip comes with its own 5V/2A power supply.
Note that Adafruit (and others) now have RGBW (red, green, blue and white) LEDs. Those are not yet supported by the node-pixel library used in this tutorial.
We will use an Arduino Uno as the interface between NW.js and the Neopixels.
Other boards that have I2C support and that are supported by the johnny-five module should also work (such as the Raspberry PI).
We will also need a 1000μF capacitor (6.3V) and a 470Ω resistor to safeguard the hardware. These two components should be available at most electronic stores or can be ordered online.
If you need to control more LEDs, you will need an additional Arduino Nano to act as a backpack. We will point you in the right direction once we get there (see below).
The Neopixels we bought from Adafruit also came with a DC-power-to-screw-terminal adapter which makes attaching the strips to the power supply very easy (you can see it in the diagram below).
Setting Up the Hardware
Adafruit offers amazingly good documentation for their Neopixels. I urge you to check it out. Of particular interest to us is the section titled Basic connections. Here is the wiring diagram from that section:
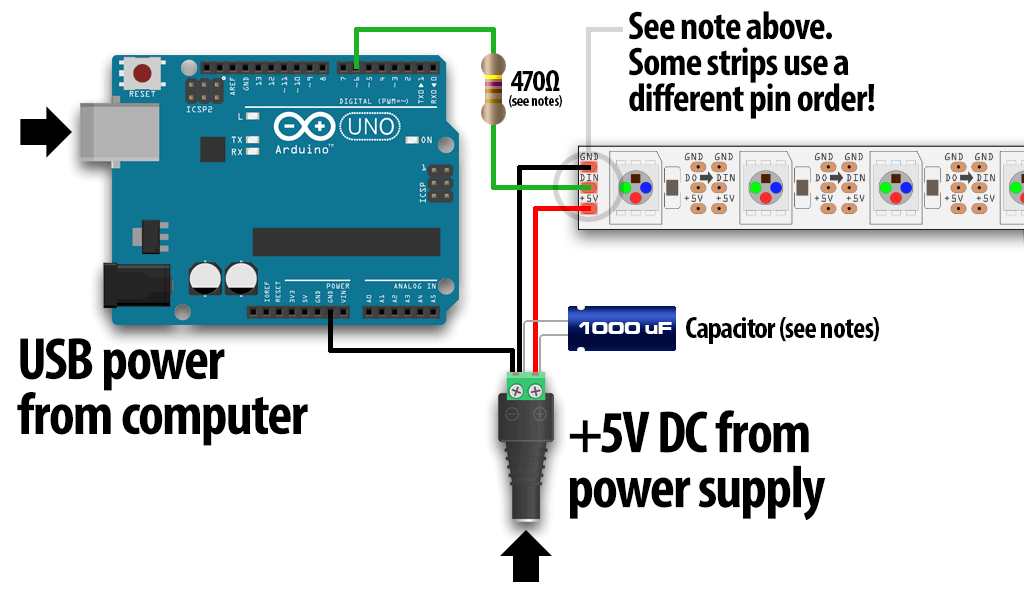
As you can see, there is a little bit of tinkering to do before we can start.
While you could power a small number of LEDs straight from the Arduino, we will be using an external power supply so our setup can grow as needed. When several strips are connected together, they become a single strip which can be controlled by a single output on the Arduino.
Important: never perform the connections on a live (powered) circuit. Always do the wiring when no power is applied. This includes power coming from the DC adapter and from the USB cable.
To hook everything up, you should first identify which way the current flows across the strip. In the diagram above, you can see arrows pointing to the right. This means the connection should be made to the terminals on the left side of the strip.
If you wanted to attach additional strips, you would do so at the right end of the strip.
There are 3 terminals on the end of the strip: GND, Din and 5V. The red wire (5V) should go to the positive (+) terminal on the DC adapter. The black (GND) goes to the negative (−) terminal on the adapter. While attaching those two, you should also install the capacitor across the + and − terminals. The capacitor will buffer sudden changes in the current drawn by the strip. As far as power is concerned, that’s it.

If you intend on using a large number of LEDs, you may need to get bigger wires to transmit power than the usual AWG24 wire common in electronics. You can use this online calculator to figure out which cable size you should be using. Neopixels typically draw a maximum of 60mA each.
Now, you need to connect the data (control) pin to the strip. In the diagram, the Arduino’s pin #6 is used. It is connected to the Din terminal on the strip. As you can see, a 470Ω resistor has been added. This will prevent spikes on the data line from damaging the first LED. To add the resistor, you can solder it at the end of the control wire or simply use a breadboard. As you can see on the photo, ours has been soldered.
With this setup, you should be able to connect up to 192 LEDs spread across up to 8 data pins (e.g. individual strips). If you need more, you will need to use a backpack. With a backpack, you should be able to control about 500 LEDs. You will find the information about using backpacks on the node-pixel module page.
When everything is properly connected, you can hook up the Arduino to the computer via USB and apply power to the strip. The LEDs will NOT light up. This is normal. We will need to send them the appropriate signal for them to activate.
Setting Up the Software
On the software side, the first thing to do is to set up the NW.js project. Basically, this means running npm init on the command line (to initialize the package.json file) and creating the HTML page and JavaScript file.
If you are not familiar with setting up an NW.js project, check out our tutorial titled Creating a Desktop App with HTML, CSS and JavaScript.
Important update: changes to Johnny-Five 1.1+ broke compatibility with browser-serialport. You should now use chrome-apps-serialport instead. Usage information is available on the project’s GitHub page.
You then need to install three Node modules:
This can be done easily on the command line:
|
1 2 3 |
npm install johnny-five --save npm install nwjs-j5-fix --save npm install node-pixel --save |
The node-pixel module will provide nicely abstracted objects to work with WS2812b-compliant LEDs. The johnny-five module will make it easy to talk to a variety of boards (Arduino Uno in our case). The nwjs-j5-fix module merely makes it possible to use johnny-five inside NW.js.
We also need to add a custom piece of software to the Arduino called Firmata. For most projects on this site, we simply install the vanilla version of Firmata. However, in this case, we will need to install a customized version tailored for Neopixel use. The easiest way to do that, is by first installing nodebots-interchange:
|
1 |
npm install -g nodebots-interchange |
This module will make it super easy to upload a specific firmware to your Arduino. With nodebots-interchange installed, simply plug in your Arduino Uno via USB and issue the following command:
|
1 |
interchange install git+https://github.com/ajfisher/node-pixel -a uno --firmata |
This will install a customized version of Firmata suitable for use with the node-pixel module.
Punching In Some Code
As always, we start our JavaScript code by listening to the DOMContentLoaded event to make sure the DOM is ready. When it is, we import our modules:
|
1 2 3 4 5 6 7 |
document.addEventListener("DOMContentLoaded", function () { var pixel = require("node-pixel"); var five = require("johnny-five"); nw.require("nwjs-j5-fix").fix(); }); |
The only thing that needs to be done with the nwjs-j5-fix module is to call its fix() method. That’s why we do not even store it anywhere.
As usual, we create a new Board object from johnny-five and wait for it to be ready. This object maps to our physical board, the Arduino Uno.
If you are on Windows, you may need to specify the COM port as an argument when creating the Board object: new five.Board("COM4").
|
1 2 3 4 5 6 7 8 9 10 11 12 13 14 |
document.addEventListener("DOMContentLoaded", function () { var pixel = require("node-pixel"); var five = require("johnny-five"); require("nwjs-j5-fix").fix(); var board = new five.Board(); var strip; board.on("ready", function() { // Neopixel code goes here! }); }); |
The next thing to do is to create a Strip object from the node-pixel module:
|
1 2 3 4 5 6 7 8 9 10 11 12 13 14 15 16 17 18 19 20 21 |
document.addEventListener("DOMContentLoaded", function () { var pixel = require("node-pixel"); var five = require("johnny-five"); require("nwjs-j5-fix").fix(); var board = new five.Board(); var strip; board.on("ready", function() { strip = new pixel.Strip({ board: this, controller: "FIRMATA", strips: [ {pin: 6, length: 32} ], gamma: 2.8 }); }); }); |
To create a Strip object, we must specify a few properties:
- board: the board object to use (in this case, this maps to the johnny-five board created earlier);
- controller: in our case, the controller is FIRMATA (but it could have been I2CBACKPACK had we used a backpack);
- strips: an array of objects containing information about connected strips (each object specifies the pin number and the number of LEDs on the strip);
- gamma: the gamma correction value (2.8 usually works well for WS2812b devices).
Then, we must wait for the strip to be ready. Once it has triggered the ready event, we can start playing with it:
|
1 2 3 4 5 6 7 8 9 10 11 12 13 14 15 16 17 18 19 20 21 22 23 24 25 26 |
document.addEventListener("DOMContentLoaded", function () { var pixel = require("node-pixel"); var five = require("johnny-five"); require("nwjs-j5-fix").fix(); var board = new five.Board(); var strip; board.on("ready", function() { strip = new pixel.Strip({ board: this, controller: "FIRMATA", strips: [ {pin: 6, length: 32} ], gamma: 2.8 }); strip.on("ready", function() { strip.color("#00ff00"); strip.show(); }); }); }); |
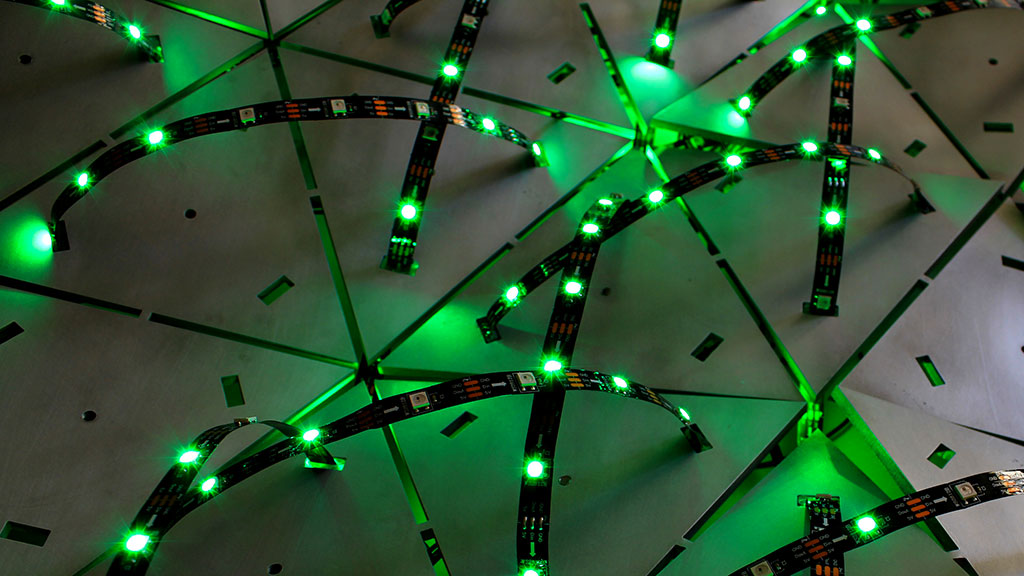
If you execute this code, you should see all LEDs on the strip shine a bright green. As you can probably guess, color() assigns a color and show() actually sends the command to update the LEDs (it needs to be called whenever you want the changes to be applied).
Note that show() is a synchronous operation which will block operation in most cases. Assume a delay of 0.5ms per LEDs when calling show(). This means there is a limit to the number of operations you can perform per second.
To access an individual LED, you can use strip.pixel(#). This allows you to manipulate LEDs individually. So, for example, you could light up each one in turn with:
|
1 2 3 4 5 6 7 8 9 10 11 |
var index = 0; setInterval(function () { strip.color("#000"); // resets the whole strip strip.pixel(index).color("#f00"); strip.show(); if (++index >= strip.length) index = 0; }, 50); |
Wrapping Things Up
You will find the complete API documentation and some nice examples on the node-pixel GitHub repo. You should know that node-pixel is not restricted to LED strips. It can also be used to control rings, matrices, sticks, etc.
For more information on Neopixels, the Überguide is your best resource.
You can also download the full source code of this demo. Note that the Node modules have been left out of the zip package. To quickly install them, simply issue the following command at the root of the uncompressed folder:
|
1 |
npm install |
As a bonus, I will be adding troubleshooting tips below. Check them out if you are having issues with this demo.
Troubleshooting Tips
1. Slowness
If you notice that an animation that was working just fine suddenly slows down to a crawl, it might be because Chromium is throttling the CPU. This is an intended behaviour to prevent poorly-designed background pages from using up too much CPU. It happens when a page loses focus. This may be triggered by switching tabs, bringing another app to the front or even opening Chromium’s development tools. This can easily be fixed by adding the following line to package.json:
|
1 |
"chromium-args" : "--disable-background-timer-throttling" |
This effectively tells NW.js to launch Chromium with that specific command line argument. Many more command line flags are available.
2. Powering Lots of LEDs
If you need to connect a lot of LEDs and are wondering how to properly power them, check out this nice article by Erik Katerborg. It is filled with connection diagrams for various scenarios.
Basically, you need to take the backpack approach. Here’s a picture of an Arduino Nano (backpack) connected to an Arduino Uno running Firmata.
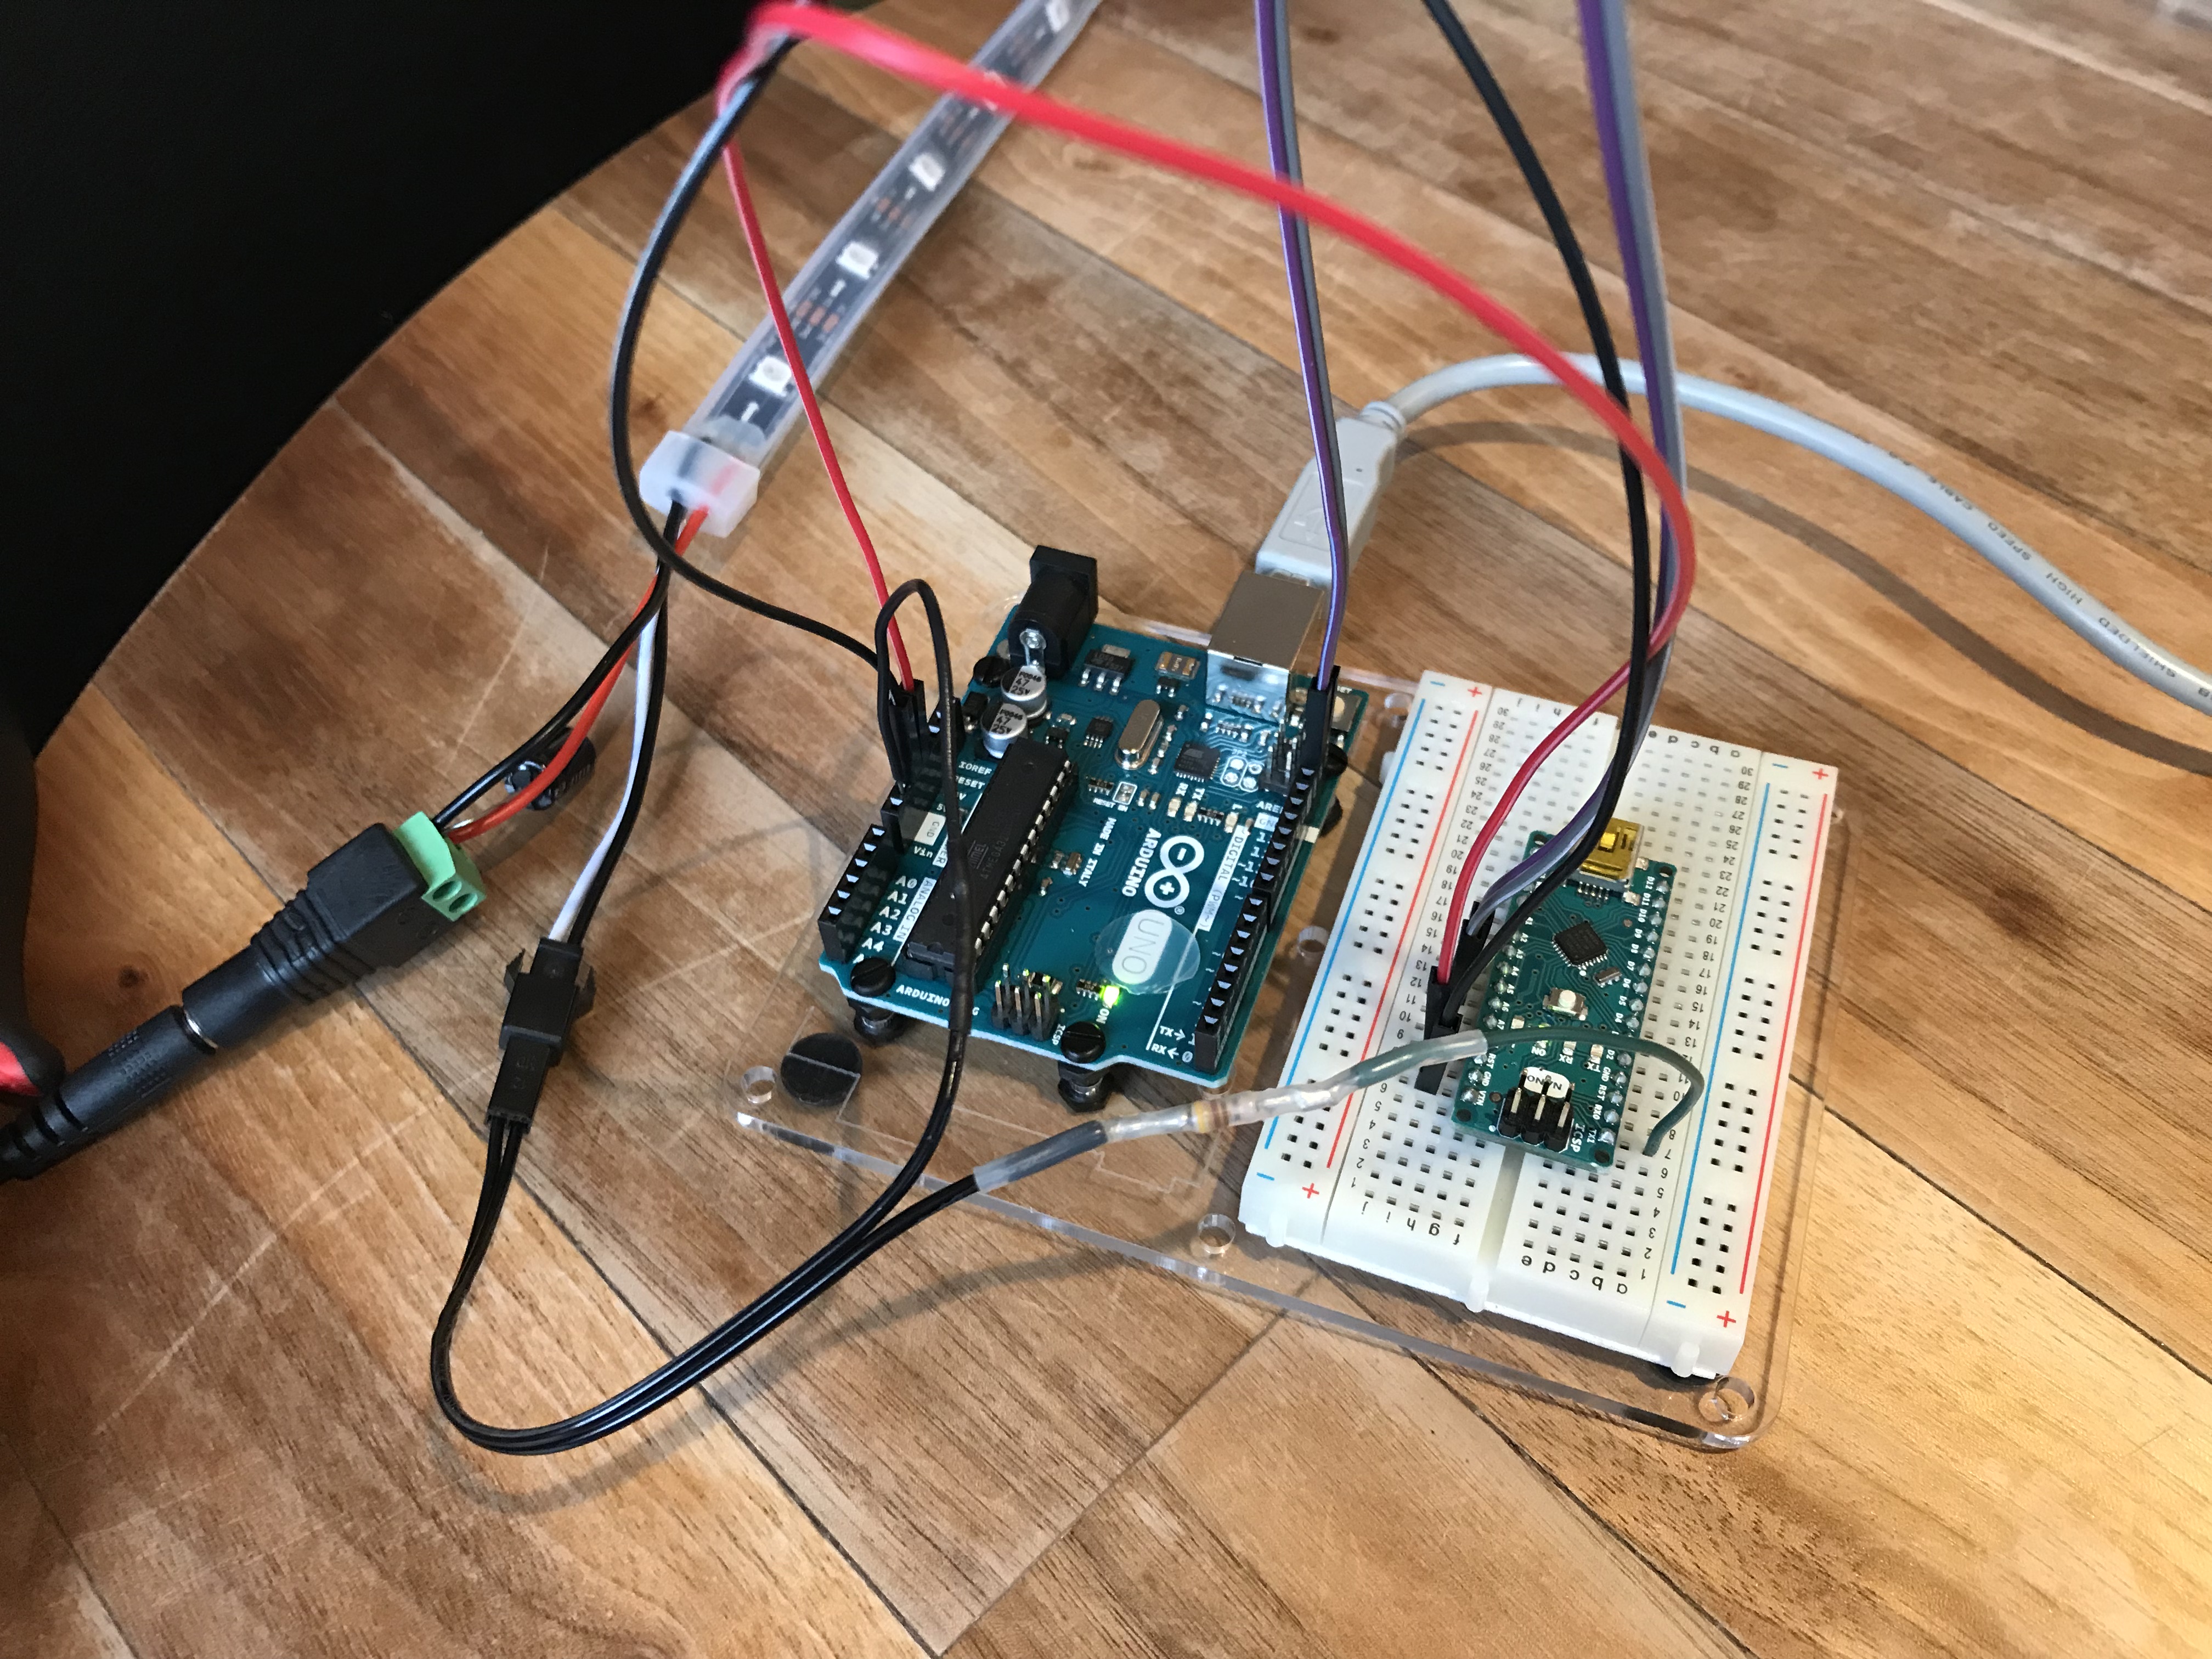
If you want to try this setup, you can uncomment lines 21-25 and comment lines 13-18 in the script.js file provided in the download package.
3. Cannot install interchange
If, like some of my students (hello Yaoyao and Alexandre!), you do not have admin rights, installing Interchange will probably fail. To get around the problem, you can use the Arduino IDE.
To perform the install, first plug the Arduino Uno to the computer via USB. Then, download node-pixel from GitHub. Extract the zip archive. Inside the extracted folder, go to firmware/build/node_pixel_firmata/ and double-click on node_pixel_firmata.ino. The file should open in the Arduino IDE. In the Tools menu, check that the right board type and port are selected. Then, press the Upload button. This will install the sketch onto the Arduino board.
For more details on installing Arduino sketches, check out this nice tutorial by LadyAda.
By the way, if you use the backpack approach, you can also install Firmata on your backpack using this method. In this case the sketch is firmware/build/node_pixel_firmata/backpack.ino.
4. The LEDs remain lit up even though my app is closed
This is the normal behaviour. The strip will remain in whatever state it was when the app is closed. If you want, you can explicitely turn all LEDs off by using this code:
|
1 2 3 4 |
nw.Window.get().on('close', function() { strip.clear(); this.close(true); }); |
This will catch the close event, perform the requested maintenance and then close the application for real.
5. At full power, the LEDs are yellow instead of white
This is most likely because your power supply cannot provide enough amperage. For Neopixels, a good rule of thumb is to calculate a maximum of 60 milliamps per LED. So, for example, if you have 60 LEDs each requiring 60mA, that’s a total of 3600mA or 3.6A. In such a scenario, you should get a 4A power supply.
The header photo was taken by girl_onthe_les and posted to Flickr. It is being used according to the CC BY-NC-ND 2.0 license.